
full circles make me happy!
a repost by ashley sisk of ramblings and photos
Several months ago, I ran across a post by Cheryle Kupsh Photography (this is her post on "planet photography" that inspired me...you should really check out her work, she's incredible). In her post, she links up with Dirk's Tutorial on "Creating Your Own Planets". So, I thought I would recreate Dirk's tutorial and show you how to create this effect yourself. The effect starts with a panorama image. I personally don't take many panorama images, but you can mimic the effect by using a cropped landscape photo (where the width of the image is at least two times the height of the image).
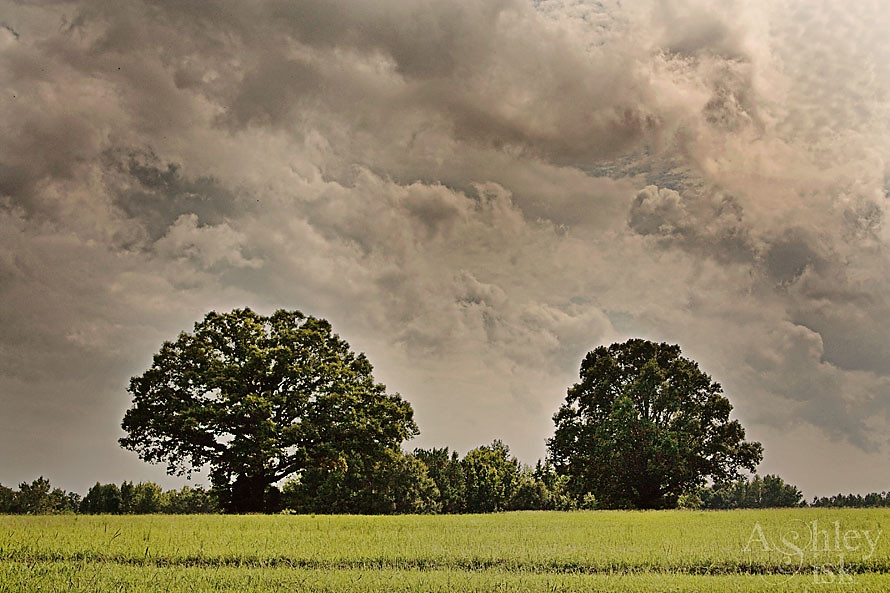
This particular image seemed to work well because the bottom area of the photo has very little detail (this becomes the center of the image and will be very distorted), the upper area of this image also has very little detail (skies and plain backdrops work well) and the horizon is pretty straight (the horizon of your image should be as close to straight as possible since the left and right sides of the image will fit together and you don't necessarily want your final image to look like it has a cracked surface.
Step 1. My first step in the process was to crop my image so that the width was twice the height.
Step 1. My first step in the process was to crop my image so that the width was twice the height.
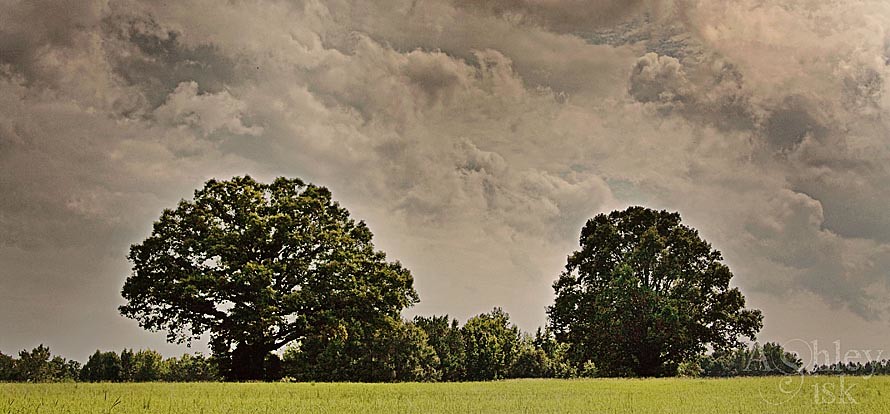
Step 2. Next, I needed to convert the photo into a square image. Go to your top tool bar in Photoshop Elements (it may be similar in Photoshop)...go to Image>Resize>Image Size and set your "height" value to the same as your "width" value (or vice versa, doesn't really matter). Be sure you uncheck "Scale Styles" and "Constrain Proportions." Click OK.

By doing so, you will get a square image like the one below.
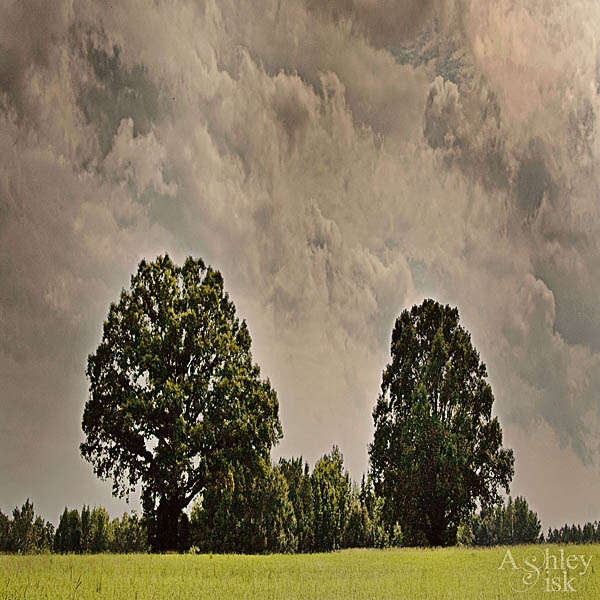
Step 3. Rotate your image 180° by going to Image>Rotate> 180°. It'll look like this:
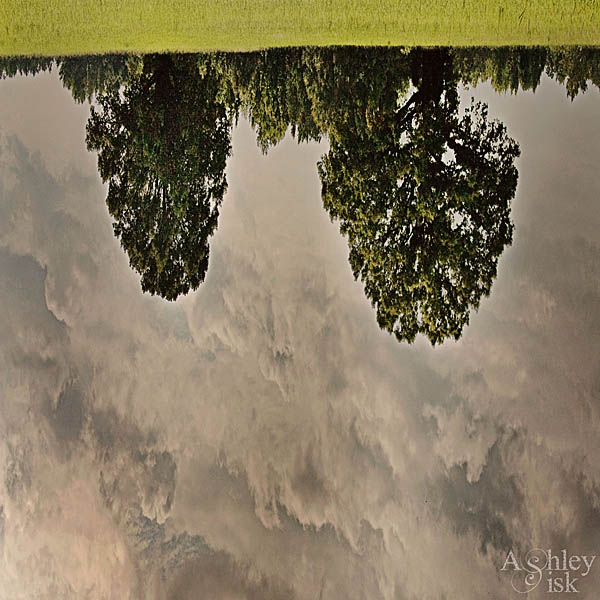
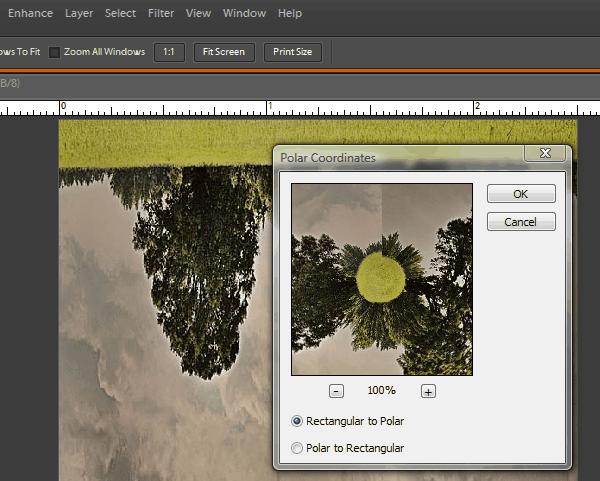
Step 4: Apply a polorizing filter by going to Filter>Distort>Polar Coordinates and select Rectangular to Polar at 100% - Click OK.
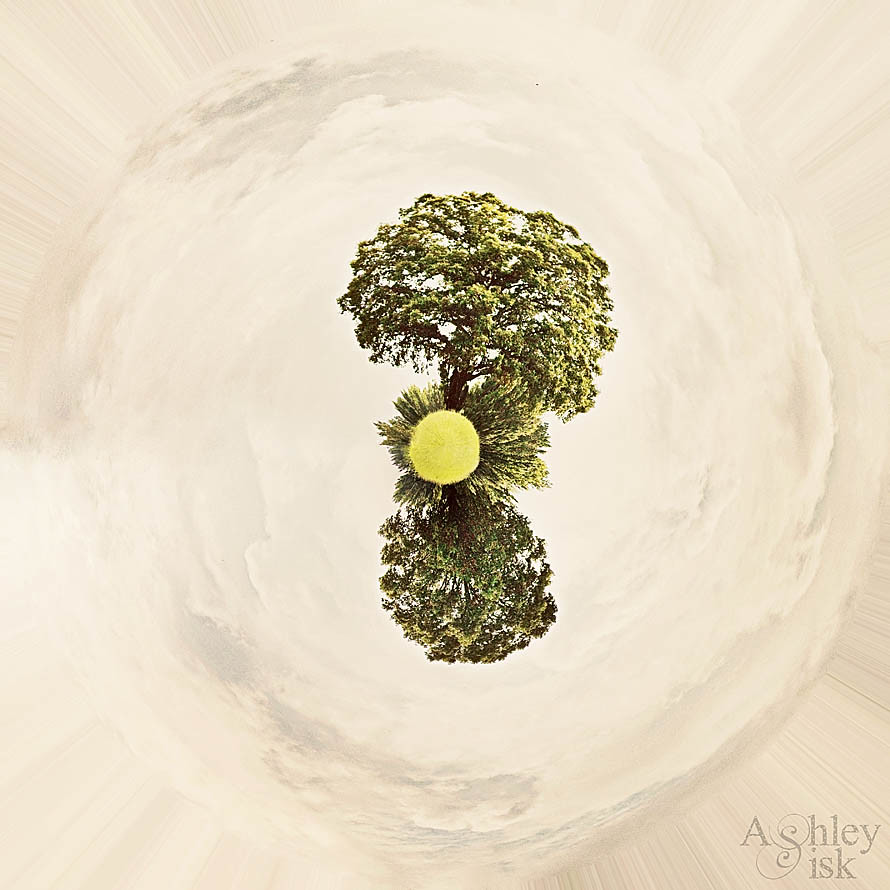
 By just doing this much, you can already get an idea of the final product...it's pretty cool.

Finally, you'll want to rotate and clean up your image. I used a healing brush to clean up the line and then did a little additional processing to achieve the effect I was going for. So...what do you think?
Now it's your turn...take these steps and practice with your own photos. I'd love to see what you come up with. If you have any questions...just let me know.
_______________________________
repost by ashley
Join us every weekend for a new muse university post!
If you would like to provide a post for this series, please contact kat [at] kateyeview.com
WOW!!! That's amazing :)
ReplyDeletelove the final look of this. I did one of chicago a while back.
ReplyDeletep://www.flickr.com/photos/sightspecific/4850896399
Everyone should give this a go! I did some a while back of Sydney Harbour following Ashley's tutorial http://photographybymichelle81.blogspot.com/2010/12/planet-sydney.html
ReplyDeleteSuch a fun and very cool effect. I'm going to have to give it a try! Thank-you!
ReplyDeleteA very intriguing effect! Thanks for sharing, Ashley.
ReplyDeleteVery cool! I can't wait to try this!
ReplyDeleteI am thinking ... if I am on a desert island, I would want my camera, lap top and Photo Shop and then I would be amused for months!